
Create a Custom Widget to Call a Web Service in WordPress
If you’re ready to move beyond stock WordPress customization and want to roll up your sleeves to do some coding, this article will show you how. We’re going to create a widget that will allow a user to input some data to call a web service which will return results based on what the user entered.
What is a WordPress Widget?
A WordPress widget is custom code that you can add to a sidebar or any other place in WordPress that will accept widgets. Widgets allow you to customize your site by easily dragging and dropping this custom code into your site.
WordPress comes with a set of standard widgets, and there are many more available on the web to handle a wide variety of your needs. But sometimes you need some functionality that’s just not available online. This is when you’ll need to create your own widget.
Creating a Widget
If you are interested in reading up on WordPress’s widget documentation, you can review the WP Widget Class reference material, but we’ll cover everything you need to know to get a widget up and running here.
Every widget must contain a few elements in order to work properly. It will require at a minimum the following four functions:
- __construct() – constructor function where you can define your widget’s parameters.
- widget() – contains the output of the widget.
- form() – determines widget settings in the WordPress dashboard.
- update() – updates widget settings.
In addition to the functions above you’ll also need to provide some metadata about your widget, which looks something like this:
/*
 Plugin Name: CC Call Web Service
 Plugin URI: www.blogsmithing.com
 Plugin Description: Calls a Web Service.
 Version: 1.0
 Author: The Blogsmith
*/
(I always preface my custom widget names with “CC” to indicate that it’s “Custom Code”)
Wait a Second! What is a Web Service?
A web service is piece of code that lives on another server that allows you to call it to retrieve or update some data. A common web service would be the ability to query for the temperature in a city by providing the zip code. You would send the zip code to this “service” and in return it would send you back the current temperature.
The web service we’re going to be working with today will be a free web service provided by W3Schools, and it will allow us to convert a temperature from Fahrenheit to Celsius.
The web service wsdl is located here: https://www.w3schools.com/xml/tempconvert.asmx?wsdl
The method we’ll call will be “FahrenheitToCelsius” which takes one parameter: “Fahrenheit”.
In order to call this web service we’re going to use the SoapClient PHP class. You may need to set up your web site to allow SOAP calls. If you don’t know how to find out if your web site allows SOAP calls you can install a plugin called “WP-ServerInfo” and review the PHP logs.
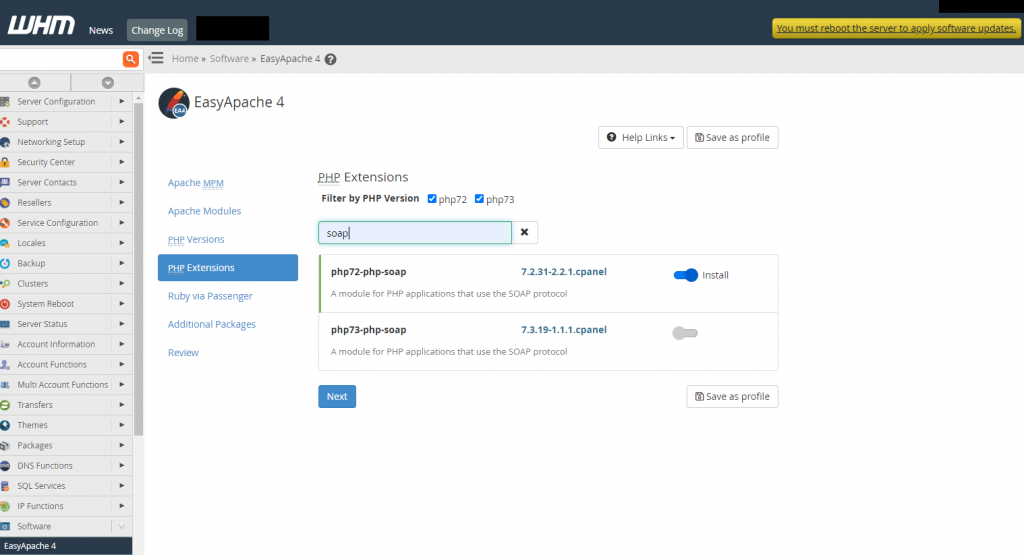
Sometimes you may need to install SOAP for PHP on your hosting provider. For my current hosting provider, Interserver, I logged into WHM, navigated to EasyApache 4 -> PHP Extensions, searched for SOAP, chose “Install” on the SOAP extension for my version of PHP and then walked through the rest of the steps until I was able to provision the change.

Finally , the Code to Call the Web Service
Our widget is going to accomplish the following tasks:
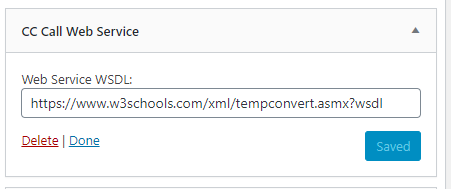
1. Provide a form to the WordPress administrator to configure a web service WSDL URL. The widget will use this URL to know where to go to call the web service.
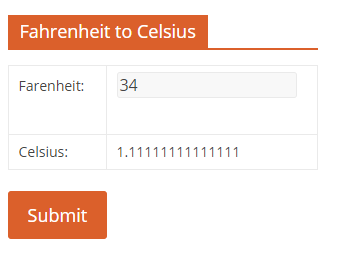
2. Provide a form to the user of the website to enter a temperature in Fahrenheit so they can convert it Celsius.

3. And finally, call a web service to get the converted Celsius value.
Since we’re writing the widget in PHP we can just use standard PHP code to call the web service, making sure that we implement all of the widget methods mentioned above.
Here is the full code for the widget, commented so that you can see what each part of the code does.
<?php
/*
 Plugin Name: CC Call Web Service
 Plugin URI: www.blogsmithing.com
 Plugin Description: Calls a webservice.
 Version: 1.0
 Author: The Blogsmith
*/
class cc_call_web_service extends WP_Widget{
	// Mandatory Constructor function. We'll configure the name here.
    function __construct(){
        parent::__construct(FALSE, $name = __('CC Call Web Service'));
    }

	// Write the output of this widget to your WordPress interface.
    function widget($args, $instance){
        // Get the URL to the web service WSDL that the WordPress administrator configured in wp-admin
		$url = $instance['webserviceUrl'];

		// Ensure the code is wrapped properly with 'before_widget'
		echo $args['before_widget'];

		// Display the title of the Widget to the enduser
        $title = ( ! empty( $instance['title'] ) ) ? $instance['title'] : __( 'Fahrenheit to Celsius' );
        echo $args['before_title'] . $title . $args['after_title'];

		$valFahrenheit = "";
		$valCelsius = "";

		// On form 'Post Back' grab the value from the Farenheit text box
		// and use it to call the Farenheit to Celsius conversion service
		if ($_SERVER["REQUEST_METHOD"] == "POST") {
			if (empty($_POST["valFahrenheit"])) {
				$valFahrenheitErr = "Fahrenheit is required";
			} else {
				$valFahrenheit = $this->test_input($_POST["valFahrenheit"]);
			}

			try {
				$client = new SoapClient($url, array('trace' => 1));
			}
			catch(Exception $e) {
				//echo "Caught exception: ";
			}

			$result = $client->FahrenheitToCelsius(array('Fahrenheit' => $valFahrenheit));

			if (is_soap_fault($result)) {
				echo "There was an error processing your request.";
				return;
			} else {
				// Store the value of the return parameter.
				// This will be displayed on the user input form
				$valCelsius = $client->__getLastResponse();
			}
		}

		// Display the form for the user to enter Farenheit value
		echo "<form method=\"post\" action=\"\">";
		echo	"<table cellpadding=\"0\" cellspacing=\"0\" border=\"0\">";
		echo	"<tr>";
		echo	"<td>Farenheit:  </td>";
		echo	"<td><input type=\"text\" name=\"valFahrenheit\"  value=".$valFahrenheit." ></td>";
		echo	"</tr>";
		echo	"<tr>";
		echo	"<td>Celsius:  </td>";
		echo	"<td>".$valCelsius."</td>";
		echo	"</tr>";
		echo	"</table>";
		echo	"<input type=\"submit\" name=\"submit\" value=\"Submit\">";
		echo	"</form>";

		// Ensure the code is wrapped properly with 'after_widget'
        echo $args['after_widget'];
    }

    	/**
	 * Back-end widget form. This is used by the WordPress administor to configure the
	 * web service URL.
	 *
	 * @see WP_Widget::form()
	 *
	 * @param array $instance Previously saved values from database.
	 */
	public function form( $instance ) {
		?>
		<?php
        $webserviceUrl = ! empty( $instance['webserviceUrl'] ) ? $instance['webserviceUrl'] : __( 'webserviceUrl', 'text_domain' );
		?>
		<p>
		<label for="<?php echo esc_attr( $this->get_field_id( 'webserviceUrl' ) ); ?>"><?php _e( esc_attr( 'Web Service WSDL:' ) ); ?></label>
		<input class="widefat" id="<?php echo esc_attr( $this->get_field_id( 'webserviceUrl' ) ); ?>" name="<?php echo esc_attr( $this->get_field_name( 'webserviceUrl' ) ); ?>"
            type="text" value="<?php echo esc_attr( $webserviceUrl ); ?>">
		</p>
        <?php
	}

	/**
	 * Sanitize widget form values as they are saved.
	 *
	 * @see WP_Widget::update()
	 * Updates widget settings.
	 *
	 * @param array $new_instance Values just sent to be saved.
	 * @param array $old_instance Previously saved values from database.
	 *
	 * @return array Updated safe values to be saved.
	 */
	public function update( $new_instance, $old_instance ) {
		$instance = array();
        $instance['webserviceUrl'] = ( ! empty( $new_instance['webserviceUrl'] ) ) ? strip_tags( $new_instance['webserviceUrl'] ) : '';
		return $instance;
	}

	// Custom function to further sanitize data.
	function test_input($data) {
		  $data = trim($data);
		  $data = stripslashes($data);
		  $data = htmlspecialchars($data);
		  return $data;
	}
}
add_action('widgets_init', function(){
    register_widget('cc_call_web_service');
})
?>
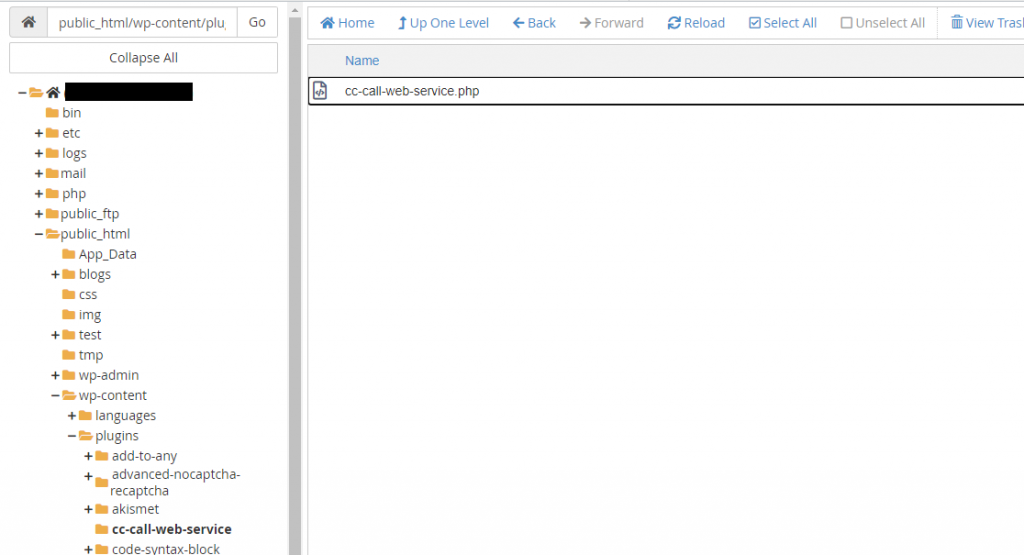
Save this code to a file, I named mine “cc-call-web-service.php”.
The next step in this process is to navigate to your web directory, create a folder in public_html -> wp-content -> plugins for your plugin. I called my folder “cc-call-web-service” as well.
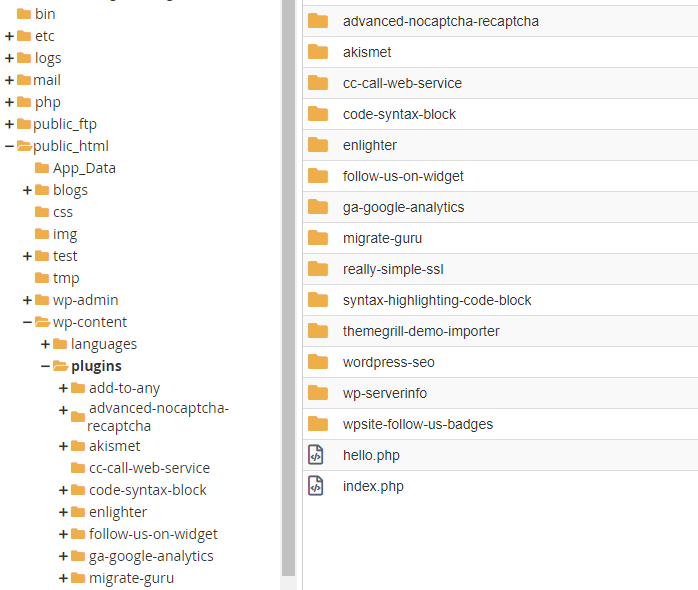
Then upload your plugin file to that folder.
Once this is all done you’ll be able to navigate to the plugin in wp-admin, activate it and at that point you can add it to your sites widget sections and configure the web service URL for the Fahrenheit to Celsius conversion endpoint.

And that’s how you can create a custom WordPress widget to call a web service.
As mentioned earlier in the article, if you want to do a deep dive into creating WordPress widgets you can refer to the documentation for the WP Widget Class, but this article should get you a long way to creating your first custom widget.