How to Add Your Site to Google Search Console
Google Search Console is a tool that Google provides webmasters that enables you to check traffic statistics in your site. Whereas Google Analytics will give you insight into stats like the number of visits per page, your bounce rate, and demographic information, Google Search Console centers around how your visitors get to your site.
With using Google Search Console you can dig in depth into statistics centered around search queries, indexing errors, review sitemaps and more. For example, this tool can show you what users searched for in Google that brought them to your site. This is an extremely powerful tool, because it gives you concrete data you can use to create SEO-friendly content that focuses on the search terms users are already using to access your content.

How to Connect Your Site to the Google Search Console
The first thing you’ll need to do is to navigate to https://search.google.com/search-console and create an account. Once you have an account created follow these steps to add your web site to the search console. If you plan on running more than one website just repeat these steps for each of the websites you own. You can add multiple websites (or “properties” in Google parlance) under one account.
Step 1: Add a Property
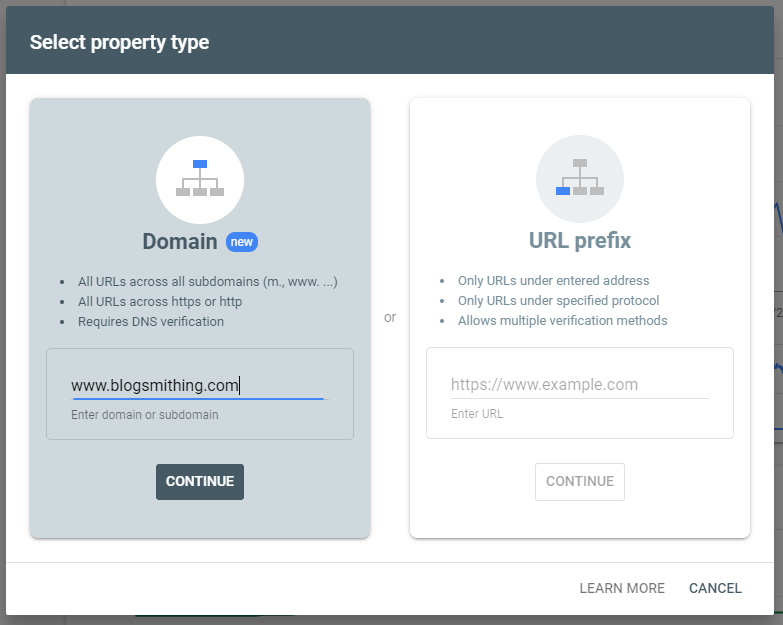
The first thing to do in Google Search Console is to add a property. This is essentially telling Google which website you want to collect data for. As of the time of writing of this post Google has the ability to search across all subdomains, http and https simply by entering your domain name.

Step 2: Verify Your Domain
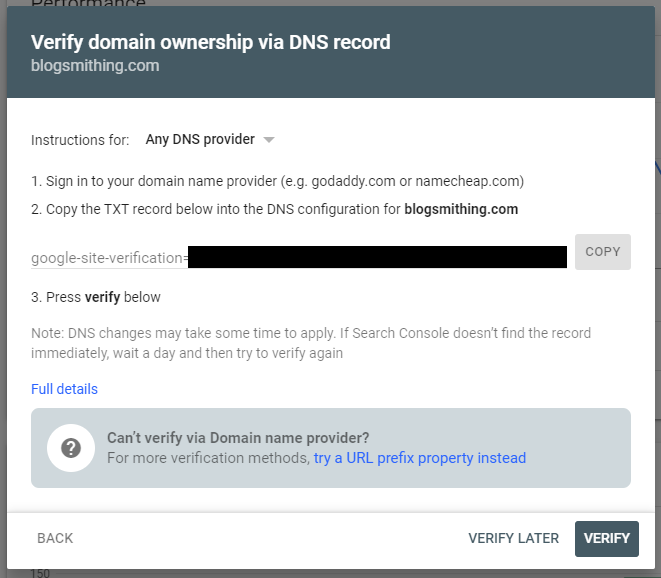
The next thing Google will want you to do will be to verify your domain. This is a necessary step so that nobody but you can access your search data. You will be presented with a screen that contains a TXT record that you will need to add to your DNS configuration. This isn’t as scary as it sounds, I’m about to walk you through it.

Log into your hosting provider
You’ll want to leave the browser tab open that has the Google Search Console verification screen. Open a new browser window and log in to your hosting provider, so that your hosting provider login is one window and the Google Search Console remains open in another window. In my case I’m currently hosted with Interserver, so the following screen shots are Interserver specific, but other hosting providers should have a similar set up. Once you get logged into your hosting provider go to the DNS settings of your site.

If you’re using Interserver you’ll need to click “Go To Advanced DNS Editor”

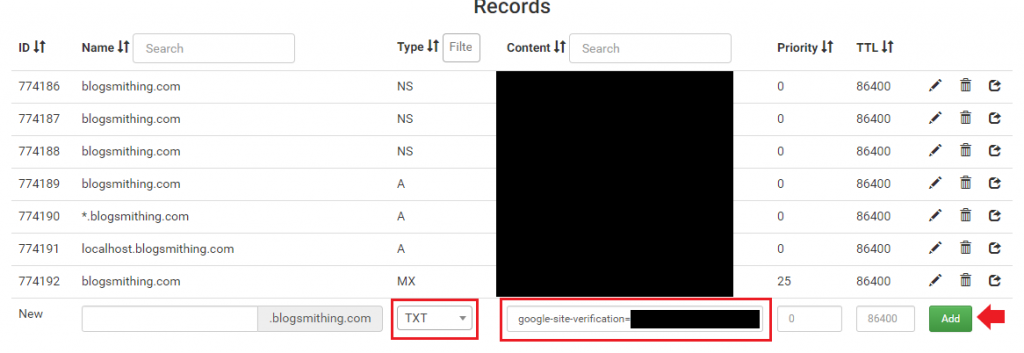
Once you are in the Advance DNS editor you’ll simply add a new TXT record. Just select “TXT” from the record types drop down, and copy/paste the google-site-verification link from the Google Search Console verification screen. When you’ve done that click the “Add” button.

Verify your Domain in Google Search Console
Now that you’ve added your TXT record in you hosting provider you’ll want to click the “Verify” button back on the Google Search Console verification screen.
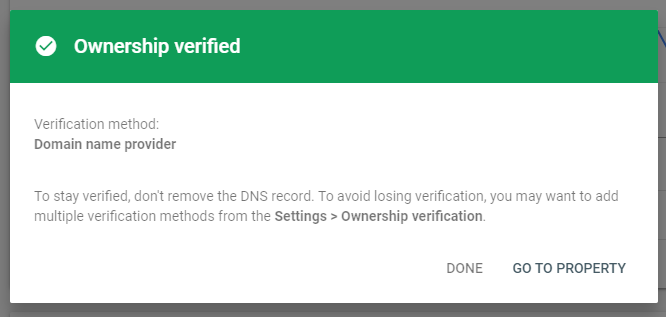
If all went well you should see a success screen.

If for any reason you get a failure screen you can wait a few minutes to ensure the DNS record change has propagated.
That’s it. Once you’ve set this up you’ll be able to start to collect data on your website that will help you analyze how people are finding your content.
Final Thoughts
There is a wide assortment of tools online to help you reach your target audience and expand your readership. The Google suite of products are a great place to find data that will help you structure your content in a way to reach the most amount of readers. It’s worth putting the time into setting these tools up and learning them well. It will help you create a successful website by providing you with the information that you need to make correct SEO decisions.

Pingback: Use Yoast Auto-Generated SiteMaps for Google Search Console - Blogsmithing
This is really a very informative blog about interserver hosting. Thanks for sharing this blog.