
How to Make Your Blog Faster With a CDN
As a blogger likely one of the first challenges you will come across will be website performance issues. The more content you add to your blog the more you’ll need to focus on ensuring that it is performing well. This is especially true if you use a lot of high quality images in your site. There are many ways to optimize your blog, but in this article we’ll focus on just one, using a CDN.
What is a CDN?
A CDN (Content Delivery Network) can be thought of as a bunch of servers that will cache (store your website content) in a distributed fashion. This means that when you use a CDN your content will be served up from a variety of servers around the world rather than pulling from your hosting provider every single time your website is served up.
What are the benefits of using a CDN?
A CDN will provide many benefits. Depending on what your needs are, and if you use a free or a paid CDN the benefits will vary, but here are some of the basic features:
- Your website will load faster.
- Your bandwidth costs could be reduced.
- Your website security will be improved.
- Your blog’s uptime will be improved through the redundant content availability provided by a CDN.
How do you set up a CDN?
Some hosting providers come with a CDN, but if yours doesn’t then not to worry, Cloudflare has a free tier available and it’s simple to use. Here’s how to set that up:
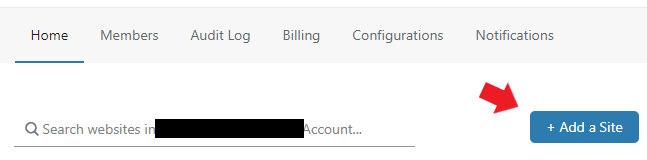
1. Create an account at Cloudflare.2. Click on the “Add Site” button.
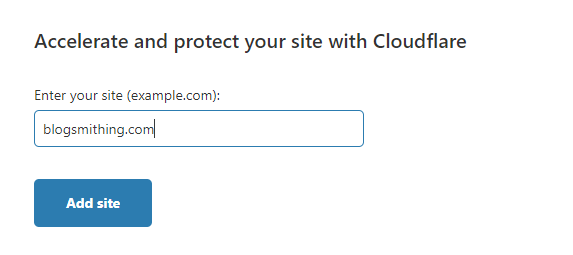
3. Add your blogs URL.
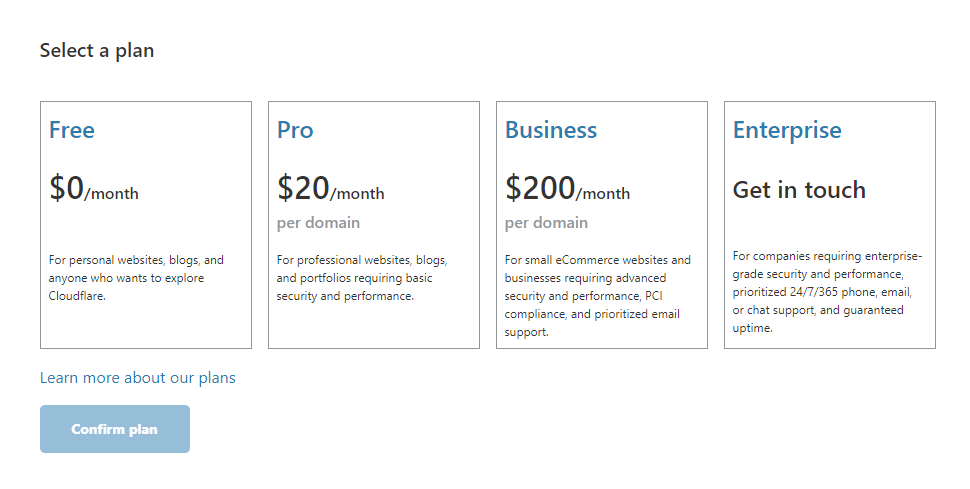
4. Select the plan for your CDN. The free version will work well for most bloggers.
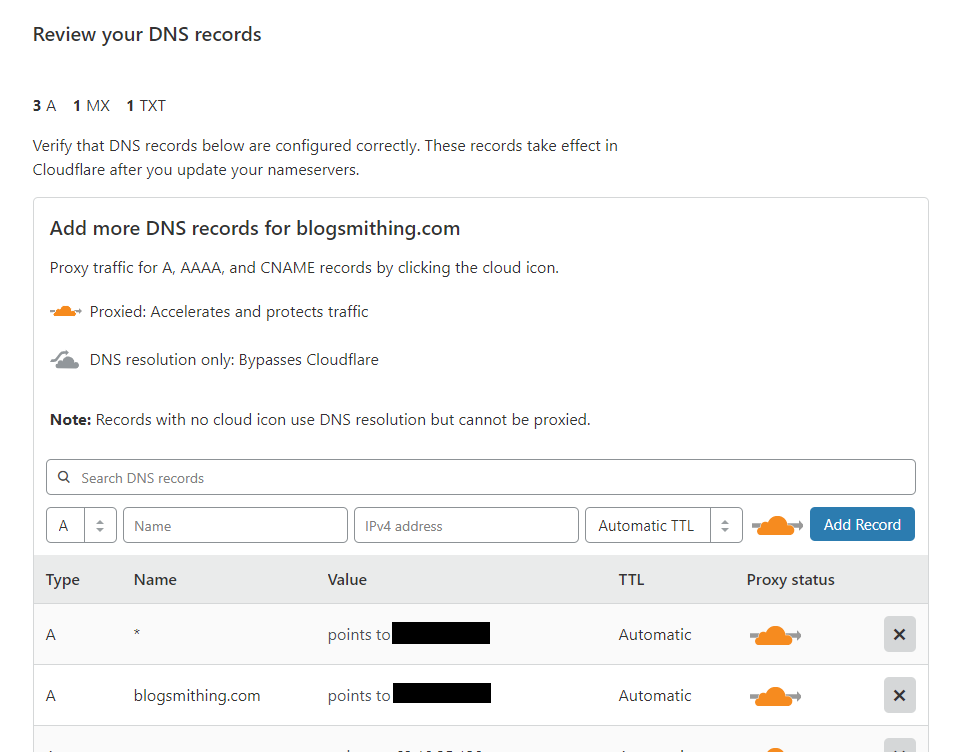
5. Review the DNS records that Cloudflare found, ensure the IP address on file for Cloudflare matches the IP address of your site provided by your hosting provider.
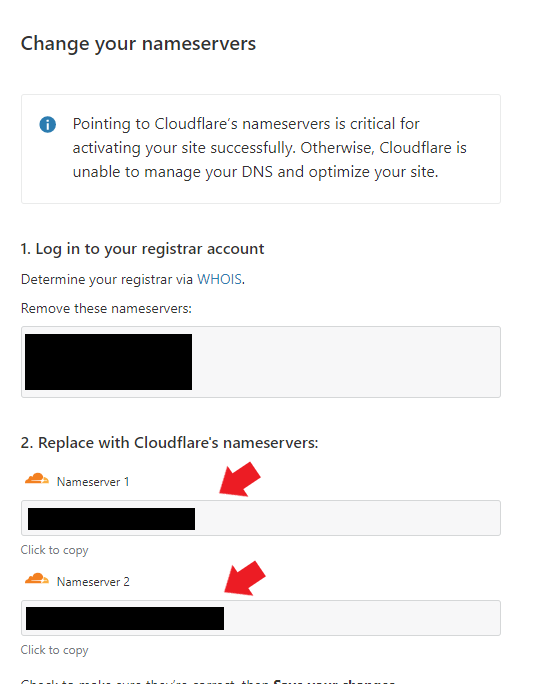
6. Cloudflare will show you your current name servers, and will provide you with new name servers. You’ll use these new name servers with your domain name registrar to point your blogs name servers to these addresses.
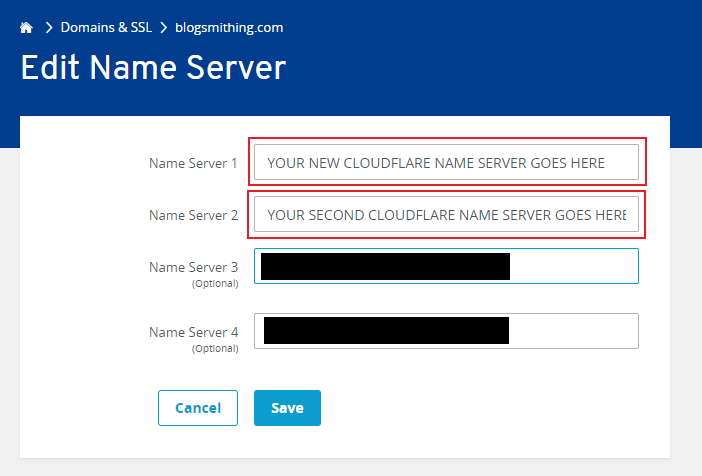
7. Login to your domain name registrar, and find the DNS settings where you can change your name servers. The screen shot below is from IONOS.
That is the basics of how to set up a CDN for your blog. We’ll talk more about site optimization using a plugin like W3 Total Cache in a future article, but doing the steps above is a good first step for improving your website’s performance.